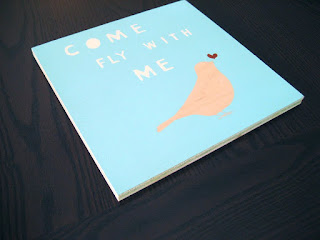
 We're so happy! Jimmy and I finished our first painting today for Love Sugar, which is for sale in our shop here.
 It was so much fun to create it together.
I've included a few pictures to illustrate the process of stencil painting--which is kind of a tricky and lengthy endeavor, but luckily Jimmy has had years of practice.
The first step is to choose or create your image. I chose a design I had previously made in Photoshop, and then I converted the image to b&w using the hue/saturation panel and printed it out on a sheet of transparency film. My design was pretty straight forward, so I didn't have to worry about too may technical details when creating my stencil.
The next part is the least fun, really, and that is to cut your stencil out. We find that using a glass mat makes for the best surface against a very sharp X-acto knife.
After everything was carefully cut out, Jimmy helped me pick a color palette. I was originally thinking of going with a range of browns, but he felt that a light blue, off white and red would be the way to go. I'm really happy with the way this combination turned out.
Jimmy then masks everything off and the painting process begins.


No comments:
Post a Comment